Hardness vs. Strength and a Salute to Rockwell
The relationship of hardness and strength is common in the distortion sensitive thermal processing jobs here at Kowalski Heat Treating, where we’re always trying to solve customer part performance requirements, especially their PIA (Pain in the @%$) Jobs!
For some of our customers, the words hardness and strength are often used interchangeably. However, when used as metallurgical terms to describe properties, the meanings are different and in some cases may even be complete opposites.
The strength of a material is directly related to the hardness and is independent of the grade. For example, if you have S7 at 48 HRC and H13 at 48 HRC they will have similar ultimate tensile strengths. The yield strength which is the stress that begins to cause permanent deformation is going to be approximately 80-95% of the tensile strength for the most tool steels. A less ductile material will have its yield strength closer to its tensile strength due to the lack of elongation and reduction of area during the tensile test. The relationship to hardness and tensile strength can be found in heat treat or mechanical strength reference books.
For us, the challenge is the delicate balance of hardness and strength, and the need to be consistent piece after piece, load after load, and delivery after delivery – the “magic and value” behind KHT Heat.
About 100 years ago, Stanley Rockwell, born in New Britain, CT in 1886, worked as a testing engineer and metallurgist for the New Departure manufacturing company in Bristol, CT., making ball bearings, automobiles and its best known product, the coaster bicycle brake some of us used when we were kids. While at the company, Stanley worked with Hugh Rockwell (no relation) an avid aviator and automobile enthusiast. The two spent a lot of their time trying to determine the best and most efficient way to measure the hardness of bearing races. The only tests at the time were Vickers (time consuming), Brinell (slow and not suitable for curved surfaces or small parts), Scleroscope (ok for hardened bearing steel but cumbersome to use) and the file test (useful only as a go/no go test at best).
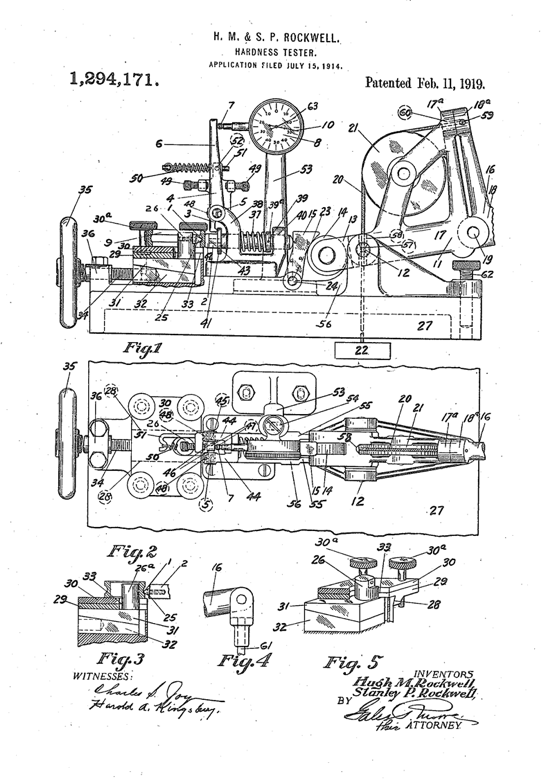
To satisfy their needs, Stanley and Hugh invented the Rockwell Hardness Tester method, a simple sequence of major and minor load testing, enabling the user to perform an accurate hardness test on a variety of different sized parts in just a few seconds. The process proved to be useful, and in 1914 they filed for a patent (granted on February 11, 1919 after the Rockwell’s had left the company).
In the original patent application, they wrote: “We have devised a hardness tester which can be used by the ordinary workman to rapidly and accurately test the hardness not only of flat surfaces but also of raceways and other curved surfaced bodies.”
After leaving New Departure during WW1, Stanley served as a captain in the Army ordinance department and after the war became the works manager and metallurgist of the Weeks and Hoffman Co. in Syracuse, NY, where he improved the tester and applied for a second patent in Sept 1919. In 1923, he opened his own business called the New England Heat Treating Service Company – the name was later changed to the Stanley P. Rockwell Company in and still exists today.
Today, Rockwell Testing remains the most efficient and widely used hardness test thanks to the insights and efforts of Hugh and Stanley Rockwell, creative engineers always looking for practical solutions to problems.


I had no idea that there is a difference between the hardness and strength of a material. I can see how it would be important to keep both measurements consistent throughout production. I’m sure everything has to be very precise in the thermal processing industry.