Watermelon

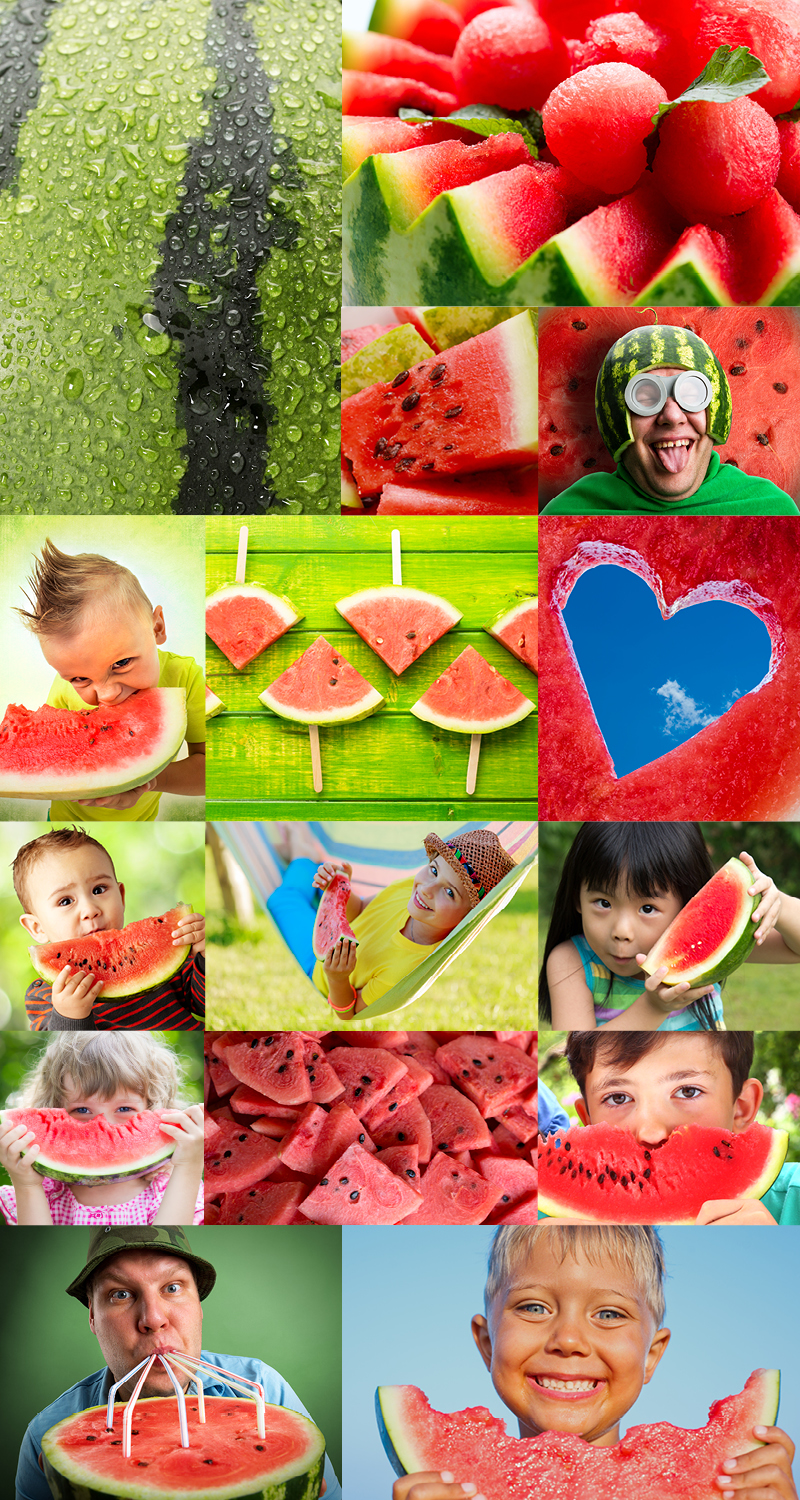
Glorious Watermelon!

Aaahhhh.  The sweet, refreshing taste of watermelon.  On a hot, summer, day, there’s something special about biting into a big slice of cool, juicy watermelon, enjoying the sweet flavor, and then spitting out the seeds.  As a kid, I remember Mom and Dad bringing home lots of watermelons for us kids to eat. For any of you who know me, this would almost never end well for my siblings! 🙂   Do you know how many seeds are in a large watermelon and how far you can spit them? (that’s a topic for another post!)   Needless to say, Mom would not be happy with us once we were finished having a seed spitting contest. Even the dogs would get into the act!  So, for our post today, I did some diggin’ just so we all can be a bit smarter about this fun summertime treat.  Enjoy!  Special thanks to watermelon.org (of course there is a watermelon dot org, right?) It’s loaded with fun facts and really great recipes.

  • The origins of watermelon have been traced back to the deserts of southern Africa, where it still grows wild today. The ancestor of the modern watermelon is a tough, drought-tolerant plant prized for its ability to store water for tribes crossing the Kalahari.
  • The first recorded watermelon harvest occurred about 5,000 years ago in Egypt and is depicted in Egyptian hieroglyphics on walls of their ancient buildings. Watermelons were often placed in the burial tombs of kings to nourish them in the afterlife.
  • From there, watermelons were brought to countries along the Mediterranean Sea by way of merchant ships. By the 10th century, watermelon found its way to China, which is now the world’s top producer of watermelons.
  • The 13th century found watermelons spreading through the rest of Europe via the Moors.
  • By weight, watermelon is the most-consumed melon in the U.S., followed by cantaloupe and honeydew.
  • Early explorers used watermelons as canteens.
  • According to Guinness World Records, the world’s heaviest watermelon was grown by Chris Kent of Sevierville, Tennessee in 2013, weighing in at 350.5 lbs.
  • The United States currently ranks 5th in worldwide production of watermelon. Many states grow watermelons with Florida, Texas, California, Georgia, and Arizona consistently leading the country in production.
  • You need three things to grow watermelon: sun, bees, and water.  Farmers generally grow watermelon in rows (8 to 12 feet apart) and in raised beds (4 to 12 inches high) composed of well drained sandy soils. Tiny watermelon plants from a nursery are transplanted into soil beds.
  • Honeybees must pollinate every yellow watermelon blossom in order to fruit. In a month, a vine may spread 6 to 8 feet, and within 60 days, the vine produces its first watermelons. The crop is ready to harvest within 3 months.
  • The rind of a watermelon is not as tough as it looks, so it is handpicked. Watermelon pickers look for a pale or buttery yellow spot on the bottom of the watermelon, indicating ripeness.
  • Watermelon’s official name is Citrullus Lanatus of the botanical family Curcurbitaceae. It is a cousin to cucumbers, pumpkins and squash.
  • More than 300 varieties of watermelon are cultivated in the United States and South America, where complementary growing seasons provide a year-round supply of watermelon in an array of shapes, colors and sizes. Because there are so many varieties, they are often grouped according to characteristics, like fruit shape, rind color or pattern, and size.  The most common watermelon options are:
    • Seeded: The classic watermelon comes in a wide range of sizes. (15-45 lb, round, long, oblong)
    • Seedless: Due to high demand, the majority of watermelon cultivars grown today are seedless – and they are getting redder and crisper thanks to seed breeding advancements. They are not the result of genetic engineering, but rather hybridization – the crossing of two different types of watermelons. (10-25 lb, round to oblong)
    • Mini: Petite “personal watermelons” are easy to handle and their thinner rinds can mean more flesh per pound. Hollow them out for a compostable serving bowl. (1-7 lb, round)
    • Yellow & Orange: These varieties lack the lycopene that gives red-fleshed watermelon its color, yellow and orange varieties add a surprising element to the plate or glass. (10-30 lb, round)
  • To pick a good watermelon, look the watermelon over. You are looking for a firm, symmetrical watermelon that is free from bruises, cuts or dents.  Next, lift it up.  The watermelon should be heavy for its size. Watermelon is 92% water, most of the weight is water.  And finally, turn it over.  The underside of the watermelon should have a creamy yellow spot from where it sat on the ground and ripened in the sun.
  • A two-cup serving of watermelon contains excellent levels of vitamins A, B6 and C, and serves as a valuable source of potassium. At 92% water, watermelon delivers needed fluids and nutrients to the body, including lycopene – which has been studied for its potential role in reducing risk of heart disease, various cancers and protection to skin from harmful UV rays – and citrulline – which can help maintain blood flow within the heart and cardiovascular function.
  • 100% of watermelon is useable and compostable – 70% flesh and 30% rind.  On average, a typical watermelon yields about 11-12 cups of cubes and 6 cups of juice.
  • If you are traveling this summer, there are dozens of watermelon festivals to choose from – here are just a few coming up:  North Carolina Watermelon Festival (7/21) Fair Bluff, NC; Outer Banks Watermelon Festival (8/3) Kitty Hawk, NC; Watermelon Carnival in Water Valley, MS (8/4) Water Valley, MS; Knox County Watermelon Festival (8/5) Knox County, IN; Denton North Carolina Watermelon Festival (8/5) Denton, NC; Hope Watermelon Festival (8/10) Hope, AR; Straffordville Watermelon Festival (8/26) Straffordville, Ontario, Canada
  • Enjoy more at The Slice – What About Watermelon blog.

Two FUN Recipes to try:

Watermelon Rind Stir Fry

 Ingredients

  • 2 cups watermelon rind, julienned (white part only, from about 1/2 of a seedless watermelon)
  • 1 cup julienned carrots
  • 1 inch piece of ginger, minced
  • 1 clove garlic, minced
  • 1/2 cup chives, cut into 3 inch pieces
  • 1 tablespoon honey
  • 1 tablespoon soy sauce
  • 1 tablespoon fish sauce
  • 2 teaspoons sesame oil
  • 1/2 cup fresh basil leaves, torn
  • 1/4 cup mint leaves
  • 1/4 cup cilantro leaves
  • add some spices, like red pepper flakes to taste
  1. Heat sesame oil in a wok over high heat. Add the watermelon rind and carrots and stir fry, stirring constantly, for 1-2 minutes. Let sit over high heat for 1 additional minute without stirring. Add the chives and stir to combine.
  2. In a small bowl, whisk together the honey, soy sauce, fish sauce, garlic and ginger.
  3. Pour the sauce over the watermelon rind and cook, stirring, 30 seconds to 1 minute until fragrant.
  4. Transfer to a serving dish. Add the basil, cilantro, and mint, tossing to combine.
  5. Sprinkle with red pepper flakes, if desired, and serve as a side dish.

Watermelon Poke Bowl

 Ingredients

  • 1/4 cup low-sodium soy sauce
  • 1/4 – 1/2 cup watermelon juice
  • 1 teaspoon sriracha chili sauce
  • 1 teaspoon sesame oil
  • 2 green onions, cut on the diagonal with whites and greens separated
  • 3 medium cloves garlic or 2 large cloves garlic, minced
  • 1/2 tablespoon minced ginger root
  • 1/3 white onion, thinly sliced
  • 3/4 pound ahi tuna, cut into 1/2 inch cubes
  • 1 small avocado, diced
  • 2/3 cup diced watermelon
  • 1/4 teaspoon sesame seeds
  • serving pickled ginger or chopped fresh ginger
  1. In a medium bowl, mix soy sauce, watermelon juice, chili sauce, oil, the white portion of green onions, garlic, ginger root and onion. Add tuna, toss and refrigerate for 30 minutes.
  2. 10 minutes before serving, add avocado and return to refrigerator.
  3. Plate over white rice seasoned with rice wine vinegar and top with watermelon and green onions, then sprinkle with sesame seeds. Serve with pickled ginger and garnish with dried seaweed for extra Hawaiian flare.


New Future for Building 13

(center) A labor of love. My love of family and food (not necessarily in that order). (clockwise from top right) Make spaghetti great again; Make a hot dog worth eating; Perfect on pancakes; Oh-yea! Ribs!!; Super spicey shrimp; This sauce was made for dipping!; Wonderful, wonderful wings.


You all know my passion for food and eating new and exciting things.  After years of lab development, iteration after iteration, discussions, planning, and late nights, the KHT New Products Team has finally completed the long-awaited development of our custom hot sauce line.  Beginning in April, we will be launching KHT HOT, starting with single 12 oz. bottles and a holiday two pack.

KHT HOT is made entirely from locally grown, organic ingredients, blended and then processed in our reserve K-VAC ovens.  Using my Grandma K’s recipe, we’ve been able to capture an amazing taste profile mirroring something we know and love – big intense heat at the front end, with a soothing tail of cooling sensation on the back end.

Said lab technicians Matt and Corey, “The vacuum approach gives us better surface control in the absence of air, with no surface oxidation, scale or decarburization.  We think the key was applying our Level 5 Certification, microstructural examination and failure analysis to the heirloom blends, and then confirming the approach in a parallel surface hardness test to be sure the ingredients can hold up under product application stress.  From our findings, ribs, chicken and roasted vegetables scored the best, with steak, pancakes and chip dip coming in a close second – simply put, we are stoked at the results.”

Plans are underway to fully convert Building 13 into a fully automated production and retail facility, including a walk up storefront, rooftop outdoor dining patio looking out at beautiful Lake Erie and drive thru window. Discussions are underway to implement local drone deliveries in early 2018.

Beginning in May, our K-GLOW team will be market testing K-COOL, and unique “chiller” sauce, featuring superior hardness and enhance wear resistance, increased lubricity, uniform coating distribution and low temperature (-300F) outcomes. Said Peggy, our lead researcher, “so much of the market is focused in the hot arena.  We decided to look at things a bit differently and went cool.  It’s a different eating experience, but something, so far, our customers can’t get enough of.”

|

|

|

|

|

|

|

|

|

|

|

|

|

|

|

|

|

|

|

|

|

|

|

|

|

|

|

|

|

|

|

|

|

|

|

|

|

|

|

|

|

|

|

|

|

|

|

|

|

|

|

|

|

|

\/

(Happy April Fool’s Day!)

🙂


“Top of the Mornin’ To Ya”

“And the rest of the day to yourself” – Stephen O’Shannessy O’Brien McMurphy Patrick Michael O’Kowalski here … hope your Patty’s Day is as good as mine. Around here at the shop, and all over Cleveland, St. Patrick’s Day is a blast. We have a 5 hour 100 year+ traditional parade that attracts tens of thousands of visitors downtown, crazy pub crawls, kegs of green beer and shamrocks galore. Many of the areas school kids are out, moms and dads with kids in wagons – all because, of course, “everyone” is Irish today. We’re feelin’ the love and luck of the Irish, and wishing all our friends, customers, vendors and neighbors a great day indeed.

And my day is not complete until I get home and sink my teeth into our traditional corned beef and cabbage dinner, with an ice cold Killigans. Every year I promise myself that I’ll take it easy, but then find I go back to the stove again and again. My wife Jackie knows me too well, and plans ahead, to be sure there is more than enough for leftovers – MAYBE!

To reap the benefits of your feast, here are a bunch of totally delicious, creative recipes to help you use up your remaining loaf n’ fixin’s (only one of them is a Reuben). Special thanks to boston.com for the great list and the websites skinnytaste.com, foodnessgracious.com, tasty-trials.com, susikochenundbacken.blogspot.com, aducksoven.com, familyfreshmeals.com, thefoodinmybeard.com, hispanickitchen.com, and foodnetwork.com. Enjoy!

  1. Corned Beef and Cabbage Soup – the whole shebang in a soup bowl — perfect for snow days. (Recipe)
  2. Corned Beef Sliders with Spicy Mustard – mini meaty sliders made with biscuits and gooey cheddar cheese. (Recipe)
  3. Corned Beef Tacos with Guinness Dipping Sauce – because almost everything tastes better in a taco and with a Guinness!. (Recipe)
  4. ‘Irish’ Hot Pockets – buttery, flaky little pockets filled with all the goodness of your St. Patrick’s Day feast. (Recipe)
  5. Irish Nachos – a magical hybrid you should share — but won’t. (Recipe)
  6. Corned Beef and Cabbage Quesadillas – just hide your maniacal laughter when everyone else is stuck eating a plain old sandwich. (Recipe)
  7. Corned Beef Hash and Egg Sandwich – like the best sausage McMuffin you’ve ever had. (Recipe)
  8. Corned Beef Empanadas with Pickled Cabbage Slaw – use up both your leftover beef and beer with these tasty little treats. (Recipe)
  9. Zingerman’s Reuben Sandwich – traditional, but yummy! (Recipe)

Be sure to call me next week with your favorite – or send me a family recipe I can try at home. Erin go Bragh!


The Big Game = Big Food

Have the essentials on hand:
Remote? Check.
Plenty of napkins? Check.
Add food from these starter recipes and your favorite beverage. Now sit, watch, eat, cheer!! 


This weekend, we get to watch “the big game” – a tradition in our house.  And with it, of course, is what I like to call “big food” – and lots of it.  It’s a chance for me to go off my regiment a bit, and enjoy pretty much everything Jackie, the girls and I put out in the kitchen – old favorites, new flavors and new dishes.  Aside from the traditional chips, dips, snacks, chili, vegies, desserts, and of course, my favorite (any meatball variation on the end of a toothpick or in a bowl!) I like to go looking for some recipes we may have not seen or tried before.  Touchdown!! – I found a great website called delish.com with a link titled “108 Amazing Super Bowl Party Foods That Are Guaranteed to Score” (HERE) and a perfect teaser line: If your eats aren’t touchdown-worthy, your team might lose. It was tough, but here are a couple of my favorites – with over 100 ideas, I’m sure you’ll find some to try – (the Reese’s peanut butter ball just made me laugh out loud).  Enjoy!


TATER TOT SKEWERS
(come on, just not fair – bacon, cheese and tater tots … should be outlawed!)
INGREDIENTS

  • 1 lb. frozen tater tots, defrosted
  • 12 slices bacon
  • 1 cup shredded Cheddar cheese
  • 2 tbsp. chives
  • Ranch dressing, for serving

DIRECTIONS

  • Preheat oven to 425º. Place a wire rack inside a large rimmed baking sheet.
  • Place a metal rack inside a large baking pan. On a skewer, pierce one end of a strip of bacon. Pierce and place a tater top on top of the bacon, then pierce the same strip bacon again (to top the tater tot) to form a weave. Repeat with two to three more tater tots, depending on the size of your skewers. Repeat to finish the rest of the bacon and tater tots. Place on wire rack and roast for 20 to 25 minutes, until bacon is cooked through.
  • Sprinkle cheese over the cooked skewers and bake until the cheese has melted, about 2-3 minutes more. Garnish with chives and serve with ranch dressing, for dipping.

JALAPEÑO CORN FRITTERS
(these are made with corn … so I figured they must be healthy, right?

INGREDIENTS

  • 3 cup fresh corn
  • 2/3 cup cornmeal
  • 1/4 cup shredded Cheddar
  • 1/4 cup cream cheese
  • 2 scallions, sliced
  • 2 slices cooked bacon, chopped
  • 2 eggs, lightly beaten
  • 1 jalapeño, finely diced
  • kosher salt
  • Freshly ground black pepper
  • 2 tbsp. extra-virgin olive oil
  • Juice of 1 lime, divided
  • Sour cream, for serving

DIRECTIONS

  • In a medium bowl, combine corn, cornmeal, cheddar, cream cheese, scallions, bacon, eggs, the juice of half a lime, and jalapeño. Stir to combine and season with salt and pepper to taste. Using your hands, form the mixture into small patties.
  • Heat olive oil in a large skillet over medium heat. Working in batches, fry the patties until they’re golden brown, about 3 to 4 minutes per side.
  • Garnish each with sour cream and a squeeze of lime, if desired.

WAFFLE FRY SLIDERS
(OMG – fries and burgers and waffles – just shoot me!! – pickles too!!)

INGREDIENTS

  • 1 bag frozen waffle fries
  • 1 lb. ground beef
  • 2 tsp. yellow mustard
  • 1/2 tsp. garlic powder
  • 1/2 tsp. onion powder
  • kosher salt
  • Freshly ground pepper
  • 1 tbsp. vegetable oil
  • 2 slices of cheddar, quartered into small squares
  • 1/2 cup cherry tomatoes, thinly sliced
  • Bread and butter pickles, for serving
  • Lettuce, for serving

DIRECTIONS

  • Bake waffle fries according to package instructions. Pick out 16 large, round waffles to act as the buns.
  • Meanwhile, make the sliders. In a medium bowl, mix the ground beef, yellow mustard, garlic powder and onion together with a wooden spoon. Season to taste with salt and pepper and stir gently to combine. Form the mixture into small patties. You should end up with about 8 patties.
  • Heat vegetable oil in a large skillet over medium heat. Add the beef patties and cook for about 3 minutes, until the bottoms develop a nice seared crust. Flip and cook for another 1-2 minutes, then add the cheese slices to the tops of the patties. Cover the pan with a large lid and cook until cheese melts.
  • Assemble the patties. Place 8 waffle fries (or however many patties you have cooked) on a serving platter. Top with cooked sliders. Then garnish with tomato slices, pickles and lettuce. Top with waffle fries and serve immediately.

If you have a family favorite, I’ll share it with the gang – just email me at skowalski@khtheat.com.


It’s “Chowda” Time

clam-bake-768-blog

On any fall day this month, if you are lucky enough, and in the right location (at the park, a church parking lot, or your own backyard), the air is filled with the aroma of the Atlantic Ocean – soft ‘n salty clams steaming in pots, alongside sweet potatoes, chicken, the last of the season’s corn and jugs filled with savory broth from the spigot, all waiting to be eaten and enjoyed. Around here, it’s Clambake time, and I love it.

Growing up, Dad loved to put on clam bakes for the family. My brothers and sisters would have contests on who could eat the most clams! I can only say I stopped counting once I hit the 6th dozen! The table would be piled high with the shells and there was nothing like the “chowda” that went along with it. As we have all grown up, a new tradition has been born, we try to get together annually for a clambake prior to Thanksgiving. This allows time for all of us siblings (and extended family) to reminisce and catch up at the same time. I can no longer hit the 6 dozen mark and that’s ok! The leftovers make wonderful chowder or sautéed in butter with a pinch of garlic! YUM

As you’d probably expect, clams, along with other shellfish such as oysters and mussels, have a worldwide audience. But because of peak clam sales here in September and October, Northeast Ohio is considered the fall clambake capital of the country. Churches, restaurants, fire departments, neighborhoods, veteran’s groups, cheerleaders, and families big and small all get into the act. According to the professionals who buy and sell clams, our area is a hotbed this time of year, according to John C. Young of Euclid Fish Co., a third generation fishmonger whose grandfather unloaded rail cars bearing iced-down barrels of clams from the shore. And Chesapeake Bay waterman Chad Ballard, the largest clam producer on the East Coast, agrees with all of them. We’re the top market in the fall for his product – not Chicago, Boston or New York, which have their clambake peaks in late summer. Say Ballard, “From our perspective, the volume is incredible. The northeast part of the country buys all year round, but in fall, no one comes close to NE Ohio.

Some attribute it to our origins as a kind of second Connecticut, since the “Western Reserve” lands in the northeast corner of Ohio were given to those veterans of the Revolutionary War. Others think it’s our mighty pre-election clambake ritual, when politicians use clams to lure constituents. And others think it’s just what’s needed before the chilly weather sets in for good. Here are some interesting facts:

  • While our love for the double-shelled food has held steady, clams themselves have changed. A growing number of them – 80 percent by some estimates – are now farm-raised. In a world where farm-raised seafood has a checkered reputation, clams stand out as not just a good thing, but also a necessary one.
  • Our appetite for oysters, once rivaled our love for clams. In the early 1900s, tens of thousands of gallons of oysters were consumed annually in Cleveland alone, including by families who cooked them at home.
  • The 1914 food section of The Plain Dealer was filled with reader suggestions on how to prepare them: In fritters, baked, sauced, wrapped in bacon, stuffed in a loaf, deviled, panned, scalloped, in soup and chowder, a pie, a hot cocktail. (“Hot” then meaning temperature, not spice.) “Inexhaustible seem the disguises of the festive oyster, to judge by the great variety of modes in which Women’s Exchange contributors serve the bivalve up,” read a story about a recipe contest.
  • Cleveland had restaurants devoted exclusively to shellfish menus. At a Cleveland shop called “The Ocean,” one story said, “oysters may be purchased by the barrel or hundred; bucket and count oysters by the hundred, quart or gallon.”
  • In an 1899 shucking contest downtown, the winners opened more than 50 oysters in about five minutes.
  • In 1900, the Fifth District Republican Club had its first clambake at its headquarters on Woodland Avenue. Recounted The Plain Dealer: “The bake was very successful in every way and about 200, who evidently brought their appetites with them, sat down to devour the festive clam and all that is good that goes with it.”
  • In 1906, the golden-era mayor Tom Johnson showed up with 1,200 others to the Buckeye Club’s Clambake at “Giesen’s Gardens on Pearl Street,” which raised money for band uniforms for their Cedar Point appearances.
  • Back in the day, most clams were harvested by hand rakes. Now, because of so many environmental changes, many of them are grown from egg. One-inch seedlings are sprinkled in the water and covered with netting to protect them from predators.
  • When full size, clams are gathered by hydraulic rakes and sometimes stored to help clean out grit. Wet storage also keeps inventories high and prices regulated.
  • The largest clam ever recorded was found in Okinawa in 1956, it weighed 750 pounds.
  • Hard shell clams can live to over 40 years if they can avoid humans, fish, starfish, crabs, birds and other predators.
  • In October 2007 a team of British marine biologists working north of Iceland dredged up what may have been the world’s oldest living animal–an Ocean Quahog clam from 250 feet deep turned out to be over 405 years old. Unfortunately, they realized the clams extreme age only after they had cut through its shell to count its growth rings.
  • Early French immigrants to Canada made a hearty soup called chaudree from salt pork and fish. (Chaudree derives from the Latin calderia ‘caldron’.) When chaudree crossed the Canadian border and moved down the eastern seaboard of the United States, “chowder” American style came into being. Maine, ever practical and plain, fostered a simple chowder using pure water, clams, salt pork, and of course, potatoes.
  • The dairy-rich state of Massachusetts chose to make its brand of chowder with milk, while Manhattan and Connecticut versions added tomatoes. Thus started the famous food controversy, still, if ever-to-be settled, as to whether chowder should be made with tomatoes.
  • According to the Father Willy, a clam veteran, “It’s a Cleveland thing – They just don’t do this everywhere.”


That Backyard “PIA” Job – Grilling the Perfect Burger

burger 768 blog

If you’re like me, there’s nothing like standing over the grill and working your magic – especially when trying to cook the “perfect” burger.  While I think I have a pretty good approach, based of course on my years of expertise in “heat transfer and cooling”, I thought I’d check with the food experts and pass along some really useful tips.  Listed below is a little science and a little art, courtesy of Epicurean and Fine Cooking, to help you become a certified burger grill master.  Give ‘em a try. Remember, it’s not summer without great burgers!

How do I Choose the Right Ground Beef for the Best-Tasting Burgers? – The most important factor influencing the flavor and texture of ground beef is what part of the animal the meat comes from. Meat is muscle, and as it’s exercised, its fibers expand, making the muscle larger, redder, and more flavorful. Since grinding negates toughness, the best ground beef comes from the more exercised and flavorful part of the steer. The cuts most commonly ground into hamburger are chuck, bottom round, and sirloin. Chuck is the most flavorful because it’s from the well-exercised shoulder of the animal. Ground sirloin is less flavorful than chuck, but its meat has the smoothest mouth-feel because it is the least exercised. Bottom round falls in the middle; it’s more flavorful than sirloin and smoother in texture than chuck.

We recommend chuck for burgers, not only because it has the deepest flavor, but also because it’s a less desirable cut to sell for roasts or steaks, so it usually costs less than either ground round or sirloin. As for fat content, we think a ratio of 15 to 20 percent fat to 80 to 85 percent lean offers the best combination of flavor and mouth-feel.

How Can I Make and Cook a Juicy Burger? – There are three keys to a juicy burger. Meat is composed of protein and fat. The protein parts are full of moisture (lean beef is about 60 percent water). Grinding meat pulverizes the muscle fibers, which allows the moisture inside to run out. When the absorptive pad in the bottom of a package of commercially ground beef is soaked, it’s because it’s saturated with juice that had been in the meat.  If you want a juicy hamburger, it helps to restore some of that lost moisture. The easiest way is to add water or some other liquid to the burger mixture. We’ve found that 2 to 3 tablespoons of ice-cold water mixed into a pound of ground beef greatly increases the juiciness of grilled burgers.  Another trick is to all a little Worchester sauce to your mixture.

How you handle your burgers on the grill is the second key. As burgers cook, the protein in the meat contracts, forcing out moisture. To maintain juiciness, handle burgers as little as possible during grilling. Every turn or prod forces out more juice, which is why you should never “press” a cooking burger with the back of a spatula in an attempt to speed up the grilling time. It doesn’t make heat transfer into the meat any faster, but it does increase moisture loss by wringing the meat fibers as if they were a saturated sponge.

Finally, fat content also contributes to the perception of moisture in burgers, not because the burger has more juice, but because we do; the presence of fat in the mouth triggers saliva flow. That’s why ground beef with a fat content of less than 10 percent is unpalatably dry when cooked, beef with 10 to 15 percent fat content tastes lean and juicy, meat with a 15 to 20 percent fat content tastes rich and beefy, and burgers with more than 20 percent fat have very full flavor but a fatty mouth-feel.

Is There a Trick To Forming The Perfect Patty? – To craft burgers that hold up on the grill and stay nice and tender, you’ll want to keep your ground beef chilled until right before you form your burgers (and keep them chilled until you’re ready to grill them). Chilled beef patties hold up better on the grill and will form a nice crust while still staying juicy inside. One more tip: Be gentle when forming your patties and avoid overworking the meat, which will end up making a tough burger.  Shape your patty a bit larger than your buns, so when done cooking they have a nice fit and eye appeal.

How Do I Keep Them From Looking Like Little Baseballs When Done? – Your burgers might start out like perfectly shaped patties, but as they cook, they tend to shrink up and turn a bit round instead. Luckily, there’s an easy fix. Before cooking the burgers, make a small indentation in the center of each patty with your thumb, for the simple reason of the patty rising more in the center than on the side as it cooks. The dimple doesn’t have to look like a sinkhole—a cute little shallow indent in the middle of the patty is more than enough to keep the burger from ballooning.

When Should I Season My Burger? – Every burger needs a shower of salt. But if you let it rain down on your patties an hour or two before you’re ready to grill, the salt will start unraveling the proteins in the meat and drawing out its moisture, which makes those Instagram-friendly sear marks hard to achieve. The trick is waiting for the last minute to season with salt (and pepper, if you like). Right before you throw the patties onto the grill, give them a quick sprinkling of both on both sides (coarse sea salt if you have it) to get a fantastic crust on the outside – the crust isn’t as good if you cook first and then salt afterwards.

How Hot Should the Grill Be? – Raging hot, but not for the entire cooking time. The intense heat of a grill creates a deeply browned crust, one of the hallmarks of a great burger. Surface browning begins to occur around 250°F, when the meat’s sugar and protein react with each other, forming an unstable structure, which then breaks down into hundreds of flavorful compounds that make the meat taste more savory, caramelized, and delicious. (KHT Trivia – these browning reactions are known as Maillard reactions, named after Louis-Camille Maillard, the French chemist who discovered them.) The higher the heat, the more intense the browning reactions, and the more complex the flavor.

But if left over the high heat for too long, a burger’s crust can go from browned to burnt. To prevent this, set up your grill with both high-heat and low-heat zones. Start by grilling burgers over the high-heat zone to create deep surface browning, and then move them to the low-heat zone to finish cooking, a strategy known as indirect grilling. Also, be sure to preheat the grill for at least 15 minutes, brush the grate clean, and lubricate it with an oil-soaked paper towel just before adding the burgers. (a grill grate caked with carbonized residue doesn’t make grilled food taste better—it only slows down the heat transfer, inhibiting deep grill marks and surface browning on your burgers.)

How Do I Know When a Burger Is Done? – There are lots of visual cues, but a thermometer is the most reliable gauge of doneness. As meat heats, its protein becomes drier, less translucent, browner, and firmer. The meat also shrinks, partially from moisture loss but also because fat melts and drips away, and the protein fibers become smaller as they firm up. The hotter and more cooked the meat gets, the more these physical changes manifest themselves. A rare burger (120°F to 125°F) will be running with juice, bright red in the center, and fairly soft to the touch. The same burger at well done (160°F or hotter) will be smaller, drier, brown throughout, and very tough. To take a burger’s internal temperature, insert an instant-read thermometer through its side to ensure that the thermometer’s probe has enough contact with the interior to register accurately.

I Want More Than a Perfect Patty. I Want Melted Cheese and A Toasted Bun. But How? – While you certainly don’t want to add a slice of cheese to a burger right when you start grilling, you might not get the right amount of melt if you add the cheese too late. The perfect timing? Add sliced cheese right after you’ve flipped the patties. The rising heat from the grill will melt the cheese, and if you’re using American cheese, it’ll ooze into the patty. About a minute before you’re ready to take those burgers off the grill, throw the buns on the grates, cut-side down, to get a little toastiness. The cheese will achieve the perfect level of ooze as the burgers rest on perfectly toasted buns.

After that, all you need to do is slide a leaf of lettuce underneath the patty (to prevent juices from seeping into the bottom bun), a slice of tomato on top (and maybe a squirt of ketchup and mustard), and you’ve got the most well-designed burger of the summer.

What About Food Safety? – Although you might like your burgers rare, there are safety factors to consider. All of the harmful bacteria on a solid piece of meat are on its surface. During grinding, the surface and interior are mixed together, causing any bacteria to become dispersed throughout the batch. This is why it is not advisable to eat any ground meat product that is not cooked to at least 145°F (harmful bacteria are destroyed at 140°F). The United States Department of Agriculture recommends 160°F to ensure that all areas of the food have reached a temperature of 140°F or higher, but we’ve found that at that temperature all of the moisture is gone as well. We prefer to stop cooking beef burgers when they reach 150°F (medium well). At this temperature, the meat will be slightly pink in the center and still relatively juicy.  The meat will continue to cook a bit once removed, so tenting with foils helps complete the grilling cycle and keep them warm just before serving.

What’s The Best Toppings? – this is a topic for great debate (and likely a KHT article later this year). Email me your favorites –  Experiment and enjoy!


Summer Traditions

food 768 blog


Reflecting on my 4th of July break, I’ve been thinking this week about all our great summer traditions – and, of course for me, that includes food. As I’m sure you can agree, those recipes we pull out in summertime, handed down from generation to generation, always seem so special. I think every family has them – special barbecue sauce or dry rub, summer salads, and desserts (yum!). Sometimes just the mention of them gets your taste buds going.

I asked my crew at work (and at home) to pull some of their favorites so I can share with our readers. When I asked my wife Jackie, she immediately said, “I’ll get one of your favorites, Calico Beans” – a simple recipe that slow cooks throughout the day filling the house with a great aroma, and compliments just about anything we throw on the grill. My preference is serving it with barbeque chicken, brats and potato salad. Give it a try.


Calico Beans

  • 1 lb pork sausage cooked
  • 2 medium onions chopped
  • 1 can each (16oz)
  • Drained green beans
  • Drained wax beans
  • Kidney beans with liquid
  • 1 can tomato soup
  • 6 oz tomato paste
  • 2 Tbs mustard
  • ¾ cup brown sugar

Mix all ingredients together and heat in a crock pot on low for 4-6 hours.


If you have a favorite, shoot me an email and share – I’ll collect ‘em and share
with our readers.


A Prize in Every Box

cracker jack 768 blog

One of the driving forces here at Kowalski Heat Treating is “working to delight our customers”. It’s woven into the fabric of the company Dad started over 40 years ago, and it’s still around today. More than just processing your work, treating metal and delivering goods, we like to add a little extra to what we do – whether that’s nailing a delivery promise, finding a new and better way to finish products, or just treating you with fun and respect. We think of it as “our little prize”.

When I was a kid, I loved Cracker Jack. Not just the tasty snack, but digging in and “discovering” the prize inside. I always got a kick out of finding the card, ring, tattoo, or little plastic figurines. I enjoyed the feeling I got when I found it and like to share the same with you.

I did some internet digging, and discovered today (Feb 19th) is the anniversary of “the first little prize inside” (thanks Wikipedia!). So, for all my trivia buffs out there, here’s some facts and tidbits to share:

  • Cracker Jack is an American brand of snack food, consisting of molasses flavored caramel-coated popcorn and peanuts, first registered in 1896, considered by some as “the first junk food”
  • Frederick William Rueckheim (Fritz), a German born immigrant sold hand-made steamed popcorn on the streets of Chicago beginning in 1871. Later joined by his brother Louis, (family business YEAH!) they first presented a popcorn confection to the public at the 1893 World’s Expo/Fair.
  • After adding a small quantity of oil to his mixture to separate the “chunks”, Louis created his first batch of what they called “Cracker Jack”, after a sampler said “that’s a cracker jack” (meaning of excellent quality) and the name was born.
  • In 1899, Henry Eckstein developed the famous waxed sealed packaging to retain freshness and moisture protection.
  • “Take Me Out to the Ball Game”, a song written by lyricist Jack Norworth and composer Albert Von Tilzer, gave Cracker Jack free publicity when it was released in 1908 with the line: “Buy me some peanuts and Cracker Jack!” – and we still sing it today.
  • Cracker Jack’s Mascots Sailor Jack and his dog Bingo were introduced as early as 1916 – (modeled after grandson Robert and a stray dog named Russell).
  • The Cracker Jack Company began advertising on television in 1955. appearing on CBS-Television’s On Your Account. The actor who appeared in many commercials was Jack Gilford – Shari Lewis and Lamb Chop were Cracker Jack spokespersons in the 60’s.
  • The prizes attained pop-culture status with the catch phrase “came in a cracker jack box” applied sarcastically to engagement and wedding rings of dubious investment.
  • Many attempts were made to extend the line, including a caffeine infused product called Cracker Jack’D.
  • Statisticians say if you stacked all the Cracker Jack product that’s been manufactured, it would circle the globe over 65 times – (that’s a lot of Jack!)
  • Now – can you sing the jingle?? “Candy coated popcorn, peanuts and a prize – that’s what you get from Cracker Jack.” (great – now it’s stuck in your head too!!)


Puttin’ the Squeeze On

Two blank facing pages from an old pamphlet. There is very old, yellowed tape on the binding which has been broken. The paper is water stained, torn and yellowing. The edges are rough and corners are dog-eared.

Without question, the best part about Fall is heading out into the country to enjoy all the changing colors and finding fresh apple cider. There’s something about cider (heated of course… and topped with mini marshmallows) that makes me smile. For fun, I thought I’d pass along some history of cider making in the U.S. I found on-line, thanks to Chris Lehault from Serious Eats.

According to Chris, America’s love affair with hard cider, and sweet cider, dates back to the first English settlers. Upon finding only inedible crabapples, the colonists requested apple seeds from England and began cultivating orchards and grafting wood to produce the proper apples for eating and cider. Since it was trickier to cultivate barley and other grains (for the production of beer), cider became the beverage of choice on the family dinner table – even the children drank Cinderkin, a weaker alcoholic beverage made from soaking apple pomace in water. By the turn of the eighteenth century, New England was producing over 300,000 gallons of cider a year.

As settlers moved west, they bought along their love for cider, with the help of John Chapman (better known as Johnny Appleseed). Chapman, actually a missionary, traveled west ahead of the settlers and grafted small, fenced in nurseries of cider apple trees in the Great Lakes Region and Ohio River Valley (many of the original trees are thought to still exist today). It was not uncommon then to find small cider orchards on homestead grounds. After spreading throughout the country, cider’s popularity waned at the turn of the century as eastern and German immigrants brought with them a preference for beer, and furthered diminished enjoyment by Prohibitionists who burned trees to the ground and the Volstead Act, which limited hard cider production.

Luckily today, cider can be found on the grocery store shelves, in farmers markets and at local roadside stands. The best is the pure kind – fresh squeezed apple juice cider, made by combining multiple apple types, and pressing out the juicy goodness.

Here’s my favorite recipe: Mix a whole bunch of apples, press out the juice, drink.

This weekend, get some cider, heat it up in the microwave, add in a little cinnamon, (and marshmallows) and enjoy the flavor of the season. And if you know of a good orchard where they still make cider the old fashioned way , shoot me an email at skowalski@khtheat.com and I’ll share with our readers.


Gotta Love Them Apples

apples 768 blog

As the weather is changing and the nights are getting a bit cooler, one of my favorite times of the year in NE Ohio is the fall harvest, when all of the hard working farmers put out their bounty – corn, squash, beans, tomatoes, lettuce, zucchini, – and one of my favorite foods – fresh hand-picked apples. Around here, apples are abundant – not the grocery store standards, but the farm fresh, locally grown varieties – harvested at the height of ripeness. Crisp, juicy, filled with flavor – seems like when you bite into one, you can taste the rains of summer.

I’m not sure which one is my favorite – I’m partial to Melrose (the official apple of Ohio) and Honey Crisp. I also like Mac’s and Cortland – come to think of it, I like them all. And whenever I can get it, I have a piece( or two!) of fresh apple pie, with a little vanilla ice cream on the side.

For my “foodie” friends, here’s a simple recipe – cut up one or two of your favorite apples and put them in a bowl, add a little water, cinnamon and oats, along with a sprinkle or two of sugar. Microwave for 30 seconds, stir, and microwave again for 15-30 seconds. web security Enjoy!

Make it a point to get out to the country this weekend – buy local fresh produce and a big bag of apples – I may bump into you along the way.